Contact Us

Use the form on the right to contact us.

You can edit the text in this area, and change where the contact form on the right submits to, by entering edit mode using the modes on the bottom right. 


123 Street Avenue, City Town, 99999

(123) 555-6789

email@address.com


You can set your address, phone number, email and site description in the settings tab.
Link to read me page with more information.

Blog

Filtering by Tag: montessori bedroom

Montessori Tips for Self-Dressing

Montessori in Real Life

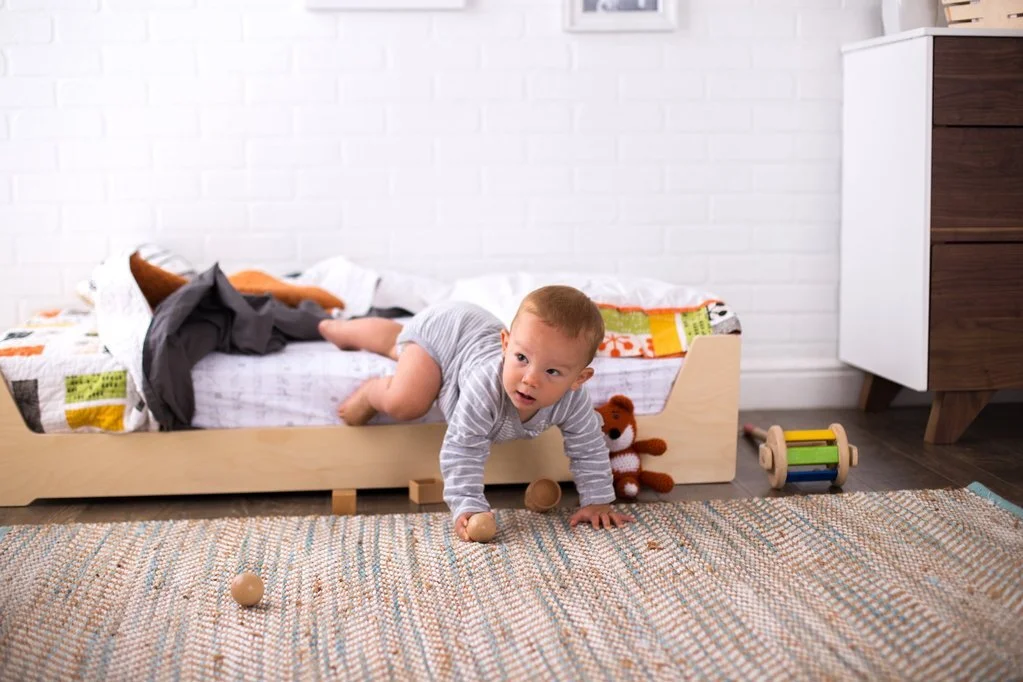
Most of us with young ones have struggled with getting our kids dressed. Once a child is crawling, the struggle begins and it can either get easier or harder when they insist on “I do it!!” As you can imagine, it’s a lot easier when our children have the skills to match their will. The more toddlers and preschoolers can do themselves, the more enjoyable the dressing process is for everyone! Keep in mind every child develops these skills at different ages, but you can expect your 3-year-old to do everything (maybe barring shirts) on their own.

Montessori Tips for Self-Dressing - Montessori in Real Life

Though getting dressed takes us seconds, it can take children a whole lot of minutes. This is the time we have to really channel our inner-patience. Set aside time for your child to practice dressing when you are NOT rushing out the door. Let them layer on those pants and wear a puffy jacket around the house in the summer. The more practice, the easier and quicker getting dressed will be when you actually are in a hurry. It’s also useful to make sure they have a step stool or chair in their bedroom and by the front door to sit on to get dressed. Additionally, hooks for coats and clothing that is accessible will allow them greater independence and joy!

I recommend introducing one item of clothing a time. Expecting a child to put on socks, shoes, pants, and shirts all at once is asking too much if they are starting at ground zero. Similarly, each item of clothing should be broken down into steps. For example, putting on shoes can be broken down into at least five steps per shoe: figure out left vs. right — open the velcro — slide foot in — put heel in — velcro closed, and then repeat for the other foot. When we are helping our child learn how to put on their shoes, we can think about those steps backwards. This means, if there are six steps, let them do just teh last step. When they can do that independently, invite them to do the last two steps - and so forth.

Montessori Tips for Self-Dressing - Montessori in Real Life

Here are some tips to make independent dressing easier for your child:

Shoes - We have found simple, single or double velcro strapped sneakers to be the easiest for putting on. You want it to be sturdy so that it doesnt bend down when the child puts their foot in. Shoes with heel tabs or teaching them to use a shoe horn can also help a child get their heel in easily. You want to make sure the shoe isn’t too tight. You can even have an extra pair that’s a size too big for them to practice with (and they will grow into soon!)

These shoes by Ten Little are pretty awesome because they make it easy to differentiate left versus right. You can also DIY with a large sticker cut in half. Last year, we used a different sticker method, with red dots for left and blue for right. Show your child how you first match the shoes to make the sticker whole or match the colors, and then put the shoes on the correct feet.

Montessori+Tips+for+Self-Dressing+-+Montessori+in+Real+Life

Socks - Socks are often tricker than shoes for toddlers. To practice the motion of putting on socks, let your child stretch rubber hair bands. They can even practice pulling hair bands over their feet onto their ankles, and back off again. When you do introduce socks, make sure they are extra stretchy, no taller than ankle socks, and maybe a size bigger than their feet. Again, start by only pulling them over their toes and let them just pull over the heel, until they get the hang of that step.

Montessori Tips for Self-Dressing - Montessori in Real Life

Underwear - These are easier to get on than pants, so start here first. Show your child how you find the waistband (that’s where the tag is!) and turn the tag to the back. Then point out each hole where each leg goes. As mentioned above, break this into steps so that they help with the last step, and finally, the first. This means they start by simply puling up the waistband in the front, then the waistband in the front and back, and finally, putting both legs in and pulling all the way up. Allso, make sure they are sitting down when they begin to put on underpants, so they don’t have the added challenge of balancing in tree pose!

Pants - If the weather permits, start with shorts. The shorter the leg, the easier to put on! It is also helpful to find pants that are roomy, stretchy, and have elastic waistbands without buttons or zippers. Avoid leggings until they’ve mastered jogger-type pants! We use the same step-by-step method as with underwear.

Jackets - This is our favorite thanks to the “Montessori Coat Flip”! Putting on a coat can be made a lot easier for toddlers with this trick. Lay the coat out so the hood/tag is at your child’s feet. Show them how to insert their arms into the arm holes and then stand and flip the coat over their head. Voila! The zipper or buttons can be a bit trickier. I’d recommend offering practice with dressing frames, which make learnigng how to button/zip easier with the fabric pulled taut.

Montessori Tips for Self-Dressing - Montessori in Real Life

Shirts - Shirts are often the trickiest for children to put on and take offf themselves. Again, start by letting them do the last step. Pull the shirt over their head and have them find one arm hole at a time. When they can get their arms in on their own, show them how to find the neck hole (biggest one) and pull it over their head. Then let them try it all together. It is easiest to start with short-sleeved shirts and then move to long-sleeve. Once again, it’s also best to make sure the shirts are roomy rather than tight!

Montessori Tips for Self-Dressing - Montessori in Real Life

Don’t Correct!

When your child does figure out how to get dressed, there will likely be a lot of backwards and inside out clothing. That’s okay! If it’s not bothering them, let it go and do not say anything. We want them to be proud of what they’ve accomplished rather than frustrated about not getting it exactly right. If they are bothered by it, you can offer the least amount of help to get it turned around or corrected. Make sure to acknoweldge how far they’ve come in their self-dressing journey!


Note: This post contains affiliate links. If you purchase a product through one of these links, you won’t pay anything extra, but I will get a small commission, which helps keep this blog going. Thanks for supporting Montessori in Real Life!

Sleep and Floor Bed Tips with Sleep Consultant Megan Kumpf

Montessori in Real Life

I am really excited to do something new here and share an interview with a fellow mama and pediatric sleep consultant, Megan Kumpf. Megan is a mom of three young children, so she knows just how tough (but important) sleep is! She has worked with all kinds of families, including those who have chosen floor beds for their toddlers. If you’d like to know more about Megan, you can read about her bio on the Sleepwise Consulting website. She generously offers a FREE 15-minute evaluation call so go ahead and schedule your call with her!

S’ room at 12 months old

S’ room at 12 months old

My own children have slept on floor beds since 6 months old. (They are now 12 months and almost 3 years) We chose to use floor beds for a few reasons. A big one is that they promote independence and freedom within limits (read more about that principle here). While the children do have more space to explore, they also learn appropriate boundaries of that freedom. We set clear, consistent expectations around bedtime and sleep. With this, the children feel secure, capable of putting themselves to sleep, trusted, and respected (not to mention they allow for a few extra cuddles at their level before tucking them in for the night!) That being said, floor beds are not a necessity for independent sleep. I believe every family needs to do what works for them, and allows them to get the rest they need while ensuring the children are sleeping safely.

With both of our children, we started setting up healthy sleep habits very early on so they have been comfortable putting themselves to sleep since young babies. As Megan talks about, this doesn’t mean abandoning them to cry on end. It is a gradual process that involves routines, consistency, wake times, a conducive sleep environment. More than anything, it’s having confidence in our children and giving the chance they deserve to learn how to sleep well, and independently.

Sleep and Floor Bed Tips - Montessori in Real Life

Whether you have a newborn, toddler, or preschooler, Megan has tips for you on how to help your child get the sleep they (and you!) need, floor bed or not. If you would like a personalized sleep plan or have further questions for her, I highly recommend scheduling your FREE 15-minute evaluation call and going from there! Without further ado, here is our interview:

D’s room at almost 3 years old

D’s room at almost 3 years old


Hi Megan! What would you say your mission is?

At Sleep Wise, as a group of Certified Pediatric Sleep Consultants, our mission is to give tired parents the tools they need to teach their children how to sleep 11-12 hours through the night. Sleep is not a luxury. Sleep is a necessity for healthy growth and development and I love being able to coach people through that. 

 Why have you chosen to help families get the rest they need? What would you say are the biggest benefits to a well-rested family?

I became a Certified Pediatric Sleep Consultant because I love to help people and I saw the benefits first hand, of being a well-rested family. My first baby was a unicorn sleeper, he just got it! My second baby was not and it took some digging with Sleep Wise to find the answers. When given the missing pieces to the sleep puzzle, it was a wonderful turn around. Being a well-rested family benefits all areas of life- play, school, and work. A well-rested family is happier. Research shows sleep brings happiness, because your brain is ready to focus, learn and explore. When our bodies miss the sleep they need we often become angry, stressed and unhappy. I love the predictability that independent sleep skills bring a family, you know your child will sleep and rest well. Lastly, the time in the evening after my kids are in bed is so valuable. When I lay my kids down and kiss them goodnight I know they will wake up in the morning from a full night’s sleep ready to enjoy the day. This also gives me time without the kids to recharge, spend time with my husband, or work with my clients.

 How much sleep do babies and children need at different ages? Does this vary widely from child to child?

 Sleep does vary a bit child to child. Some little ones have lower sleep needs and some have higher and that’s ok! They just need their own perfect routine. Below, are some average times to help you find where your baby fits. The times shown below are guidelines for daytime sleep by age. The average night time sleep needed for most kids up to age 5 is 11-12 hours per night.

Here is a great sleep chart for ages and times

DAYTIME SLEEP.png

 Do babies and children just instinctively rest when they need to rest or do they need our assistance?

 I believe that some babies are born good sleepers, however most are not and need to be taught how to sleep well. Sleep is learned skill just like getting dressed, tying your shoes, or riding a bike. However, I do believe once your baby has that beautifully built foundation for independent sleep it only takes a little encouragement and the proper wake times for them to know that it’s time for rest and even be eager to go to sleep.

Can you define sleep training in the context of self-soothing? What do you think are the biggest misconceptions about sleep training?

 Self-soothing is just one part of learning how to sleep, but it is the main part of independent sleep. When your child learns to self soothe it usually means they can calm their own body and drift off to sleep on their own without relying on something external. When a child is capable of falling asleep independently, you’re going to see more consistent sleep patterns come about. We all have our own self soothing strategies – pillow position, window cracked open, favorite blanket, no socks etc. Helping your child find theirs is such a gift. Some children suck a finger, twirl their hair, or hold a blanket if at the appropriate age to have one. A few of the biggest misconceptions I hear are you have to use cry it out, it’s stressful for your child, or they won’t feel attached anymore. I want to take a minute to debunk each one of those. Our method at Sleep Wise is not traditional “cry it out”. While there may be some tears, you can absolutely comfort your child and work with them on these new sleep skills. Remember that it’s never too late to start. The second thing I often hear is that sleep training is too stressful for children, but I would argue that not sleeping enough or fighting sleep is equally or more stressful (and research backs me on this) and finding what’s right for your family is the best choice. Lastly, I often hear, “my child won’t love me as much or feel as attached to me if they are sleeping on their own.” I get it!! I’m a mom of 3 and I love those sweet snuggles and individual times with each of my children, but I promise seeing them wake up each morning well rested and happy is a win. Check out our blog on sleep training and attachment parenting if you want more information here: https://sleepwiseconsulting.com/attachment-parenting-sleeptraining/


How can parents set up healthy sleep habits from birth? When does routine become important?

 Yes, you can absolutely start from the very beginning and lay a great sleep foundation. In the newborn days it’s just a gentle repetitive process. If you were to choose a newborn plan with us there is no crying involved at all with sleep. They are just too tiny and need to still eat quite often. Starting right from the beginning allows you to encourage self-soothing skills and by 12 weeks little ones are peacefully drifting off to sleep on their own and sleeping 10-12 hours at night with feeds as needed. Around 4 weeks is a great time to gently start thinking about a loose routine. Using an eat, play, sleep routine will help your baby learn to fall asleep without feeding which is a great start. Don’t be afraid to try laying your baby down drowsy and see what happens.  A dark room, sound machine on, and soothing as needed is a great way to start! Often babies will surprise us and fall asleep on their own.

Could you give us a sample bedtime routine for an infant? How about a toddler?

Bedtime routines are so beneficial in teaching your child that sleep is coming. I like a routine to be simple and predictable. For most children about 20-30 minutes is good, maybe a bit longer on bath nights. For a baby birth to three months I would aim for something like this – bath, lotion, jammies, a book, feed, kisses, goodnight. Once a child is older than 3 months of age it’s important to move the feed to the beginning of the bedtime routine. This helps ensure your little one is fully using those independent sleep skills and not drifting to sleep while eating. For an older child you would want to include brushing their teeth and going potty if they are to that point. To help create predictably, choosing a number of books helps older kids know what’s expected, usually I recommend about 3 books pending the length. With my older kids I love to talk about something that made them happy that day or something they were grateful for, ending the day on a positive note always does the heart good.


Let's talk a bit about floor beds. Would you say that floor beds can work for any family or child? Are there any safety considerations?" 

I feel that floor beds can be successful for a younger child if he or she is used to having freedom within limits. Some examples being, if your child has too much freedom or no limits during the day, but you want them to stay on their bed all night, that’s going to be challenging because your child won’t understand the why behind it. In order for a floor bed to be the most successful, there has to be a foundation built during the day with your child of healthy boundaries and expectations. There are some safety considerations to pay close attention to. I would recommend waiting until 6 months and up to introduce a floor bed. That way your baby has a chance to work on those independent sleep skills. If your child is under the age of 2 years old your floor bed should be a firm crib mattress per AAP recommendations. A regular twin or full size mattress is too soft and can cause suffocation risks. The floor bed should be just a flat fitted sheet and away from the walls so that your baby can’t become trapped. Making sure your little one's room is safe, checking furniture anchors, outlets, small objects, window curtains, blankets, doors, etc. Safe sleep is always most important for your child.

If parents are interested in introducing a floor bed to an infant, how would you suggest they begin? Is it possible to teach an infant to self-soothe on a floor bed?

When introducing a floor bed it’s super beneficial to already have those independent sleep skills mastered. If you can start at a younger age teaching those self-soothing strategies in a bassinet or crib, it will make the transition more smooth. When introducing a floor bed, starting with nap time can be a good option so you can see your child and know what they are doing. However, if you find this to be tricky, opting for bedtime might work better since their natural sleep drive is higher at night. You can teach a baby to self soothe on a floor bed, just know it may be a little more challenging. If you’re willing to be consistent you will get the results you’re looking for. Just make sure to consider all safety components first.

What tips would you give parents who are making the switch from a crib to a floor or toddler bed?

 My top tip is always to be 100% consistent. There may be some bumps in the road when you transition to something new, but the consistency is key. Again, as I mentioned above, if your child is already in a crib and you’re thinking about this transition, solidifying those independent skills first will make a world of difference. If you’ve already jumped a step ahead to more space with a floor bed that’s ok but, have a plan in mind for setting boundaries and expectations so it can go as smoothly as possible. There are a lot of sleep methods out there! If you’re not sure which one is right for your family you’re welcome to reach out to me anytime for a free evaluation call. 

How do parents help their child to stay in their room (and sleep!) with a floor bed or toddler bed?

 I would first say the same as above, CONSISTENCY! Are you seeing a pattern build?! For younger children ages 6 months – 2 years having proper wake times and independent sleep skills already established will help. Proper wake times will make it so your baby/child is ready for sleep. Patience and returning them to bed as needed will help them learn those expectations. For older children ages 2+ finding something that motivates them to stay in bed is key. Positive praise, reassurance, and a “you can do it” attitude really help. Celebrating with a fun experience the next day always reminds little ones they are doing well, a visit to the park or special picnic lunch are some favorites. At this age being black and white with your expectations is crucial. For example, you have to have boundaries and expectations during the day with your child if you want it to smoothly translate over to bedtime. Using an ok to wake clock is a wonderful visual learning tool for sleep. If your child comes out when it’s sleeping time, you will consistently take them back and remind them of the boundaries and the clock. Practice makes perfect! All of these big changes take time.

Is it ever too late to help a child sleep independently? What are some tips to help a 3+ year old fall asleep and stay asleep on their own? 

 It is NEVER too late to establish healthy, independent sleep skills. I work with ages 0-10 years. Sleep is the gift that keeps on giving. We all have to sleep! For older kids ages 3+ it has to be clear and consistent. Making it positive and finding a sleep method you feel comfortable with is key. Remember, at this age your child has been sleeping a “different” way for a long time. Do not expect results overnight, it can absolutely take a few weeks to see the new changes happen. At this age carving out some special one on one time during the day can really help your child feel more confident sleeping independently at night. Little ones crave that attention and filling that cup during the day will help them settle in quickly for the night. Talking during the day about how sleep is good for your body and it will give them super power energy to play well is a great start too. You’ve got this!!!

Thank you, Megan!


Note: These photos are from S’ room at 12 months old. My husband built the frame when D was 9 months or so with an opening to be able to get in and out. It has worked well for both of our children. More recently, the AAP has come up with some guidelines for floor beds. The Sprout Floor Bed Frame is acceptable, as long as the mattress is firm and flat with no soft or loose bedding. A crib sized mattress should be used until the age of two. The bed also should not be against a wall, as this could lead to entrapment between the mattress and the wall. In short, the sleep environment should align with the recommendations in the policy statement SIDS and Other Sleep-Related Infant Deaths: Updated 2016 Recommendations for a Safe Infant Sleeping Environment.

Image from Sprout Kids - use code MREALLIFE for 10% off your floor bed purchase

Image from Sprout Kids - use code MREALLIFE for 10% off your floor bed purchase

Some tips on baby/child proofing the room:

  • Anchor furniture

  • If your child is a climber, remove furniture that they could climb and fall from

  • Move dresser to the closet (keep doors closed and locked)

  • For babies: option to place changing mat on the floor and place a floating shelf on the wall to store changing supplies

  • For toddlers: consider doing diaper changes in the bathroom

  • Use a video monitor that can scan the whole room

  • Use self-closing outlet covers and hide cords or use cord covers

  • Avoid lamps or heavy items that could fall

  • Remove any small items/choking hazards from the floor

  • Use cordless blinds or curtains

  • Secure a gate at the top of the stairs

We use self-closing outlets but if/when he gets interested in cords, we’ll use cord covers

We use self-closing outlets but if/when he gets interested in cords, we’ll use cord covers

You can find links to our favorite sleep furniture/gear/decor in this post!

Note: This post contains affiliate links. If you purchase a product through one of these links, you won’t pay anything extra, but I will get a small commission, which helps keep this blog going. Thanks for supporting Montessori in Real Life!